|
NURBS ( Non-uniform rational b-splines ) 稱為非均勻性分佈雲型曲線,使用數學函數建立曲線或曲面的方式,僅需少數的控制點即可建構平滑的模型,適合運用於流線造型的超跑、工業產品等設計,而使用 NURBS 製作的幾何物件,著色時將會被細分為多邊形網面進行計算。相對使用 Polygon 多邊形建模時,需要較多的面才可以產生平滑的曲面,不過大部份的遊戲引擎只支援多邊形的模型,使用 NURBS 建立的模型需要轉換成多邊形物件,才能給遊戲引擎使用。
建立 NURBS 幾何體執行 [ Create > NURBS Primitives ] 可建立以下 NURBS 基本幾何體
提示:調整參數時可直接輸入數值,或是選取參數時按著滑鼠中鍵在視圖水平移動進行微調。
建立 NURBS 曲面 無論是製作動畫或遊戲,不可能只使用以上的 NURBS 基本幾何體,大部份的模型還是需要自行製作。Maya 使用曲線為基礎來製作 NURBS 曲面,以下說明建立曲面的工具。 Revolve 旋繞曲面
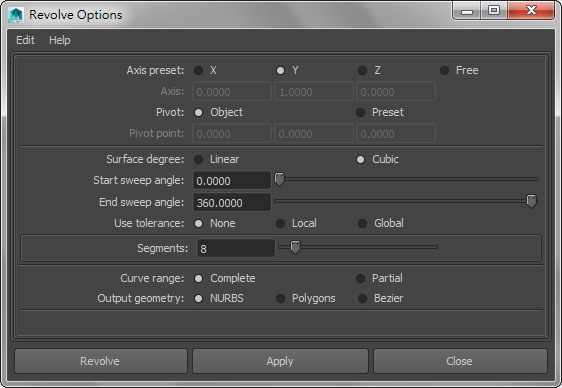
Revolve 是指定的曲線旋繞一個軸向而建立的曲面,您可選擇旋繞的軸向與旋繞角度。 Start sweep angle 開始旋繞角度。 End sweep angle 結束旋繞角度。 Use Tolerance 使用公差。 Segments 分段:設定曲面的分段,製作平滑的曲面時需要較多的分段。
Loft 放樣
編輯 NURBS 曲面 編輯 NURBS 曲面時,請先切換到 Modeling 模組(使用早期版本為 Surface 模組) Combine 合併 Separate Extract Booleans > Union, Difference, Intersection。 Smooth 平滑化 Average Vertices 平均頂點 Transfer Attributes Paint Transfer Attributes Weights Tool Clipboard Actions 剪貼簿操作 Reduce 簡化 Paint Reduce Weights Tool Cleanup... Trangulate Quadrangulate Fill Hole Make Hole Tool Create Polygon Tool 建立多邊形工具 Sculpt Geometry Tool 雕刻幾何工具 Mirror Cut Mirror Geometry |