Unity ProFlares 教學
ProFlares 是一套支援 Unity 遊戲引擎的鏡頭光暈效果外掛程式,透過使用圖片模擬光暈而不是真正的燈光,可大幅降低處理器的使用率,ProFlares 讓您製作擬真的鏡頭反光與動畫效果,並且提升遊戲執行效能。
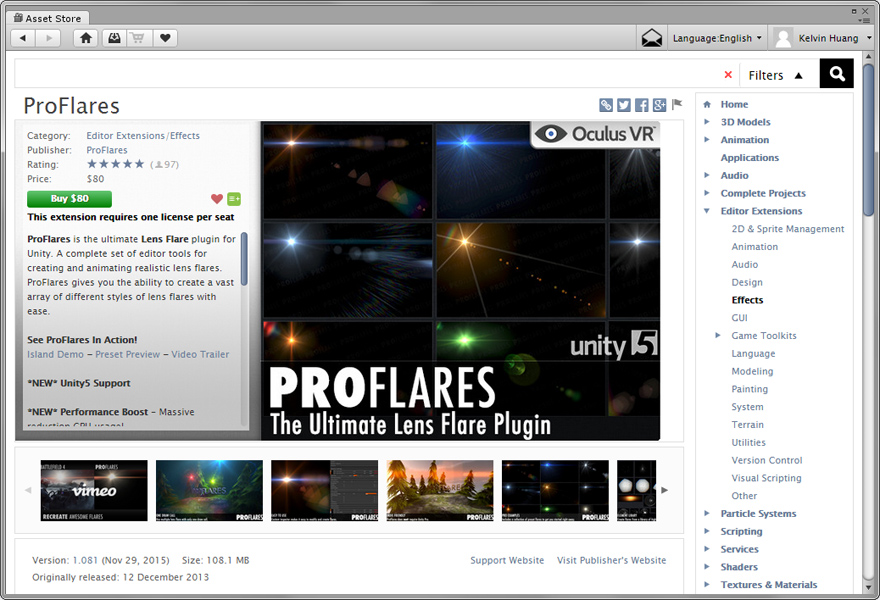

Flare Culling System - 使用大量效果時能夠進一步提升執行效能。
支援 VR 虛擬實境頭戴式顯示器 - 使用簡單而且低延遲。
High Performance - ProFlares is powered by a custom high performance automatic batching system that allows you to create multiple complex flares with only one draw call. ProFlares does this with no runtime allocations
設計師友善的設計 - Designed from the ground up to be used by artists, no code or scripting required. Just use the intuitive interface to create a flare from scratch or modify one of the many example flares included with ProFlares.
· 完整支援 iOS 與 Android 行動裝置
· 提供 20 種以上的專業光暈範例
· 超過 120 高解析度 Lens Element Library
· 支援匯入 Texture Packer Atlas
官方教學 ( Youtube )
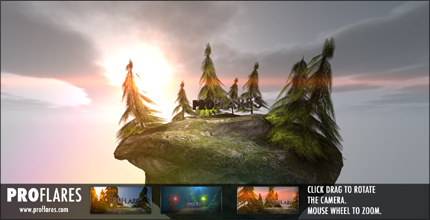
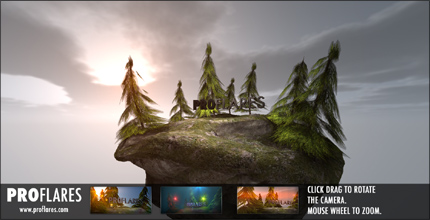
ProFlares 展示場景
開啟 [ ProFlares > Demos ] 資料夾,內附 3 個展示場景:
IslandDemo ( 1_Day > IslandDemoSun )
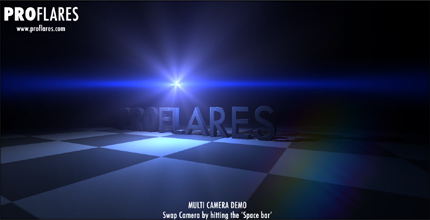
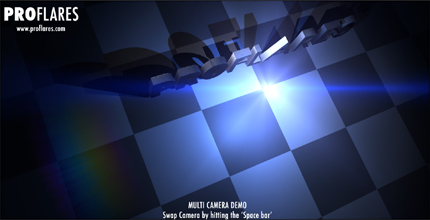
MultipleCameraDemo 按鍵盤空白鍵可切換攝影機。
SplitScreenDemo 上下分割畫面
製作燈光效果
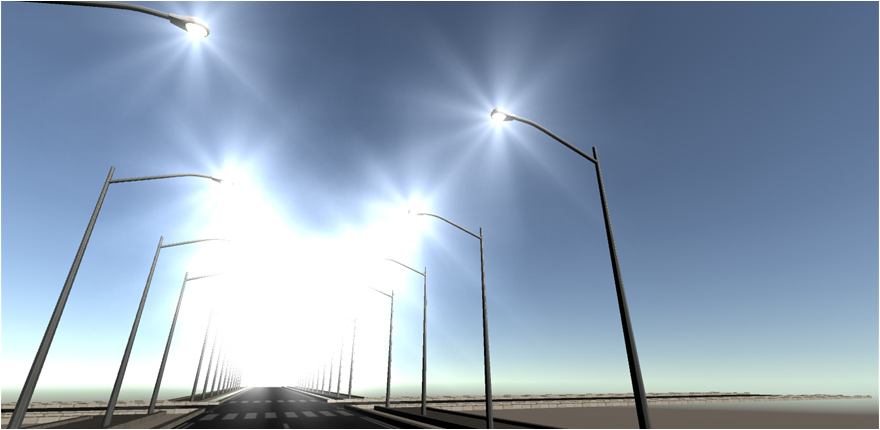
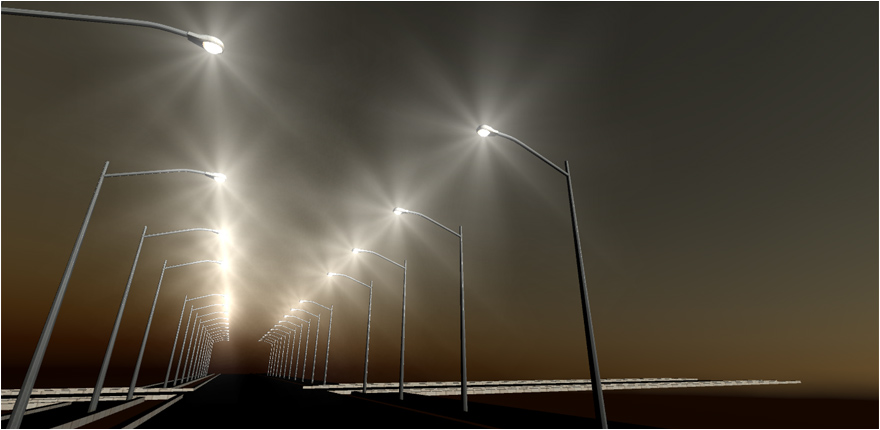
Unity 遊戲引擎提供了基本的燈光工具,但是內建的光暈與鏡頭反光效果並不夠逼真,為了提升燈光效果的真實度與層次感,可以搭配 ProFlares 外掛程式來模擬光暈效果。由於 ProFlares 是透過圖集 ( Atlas ) 模擬光暈,而不是透過真正的燈光計算,若您的遊戲場景擁有大量的燈光時,改用 ProFlares 可大幅減少 CPU 的負擔,避免影格率降低的問題。
執行 [ Window > ProFlares > Create Setup ] 建立 ProFlareSetup 物件,場景中需要此物件設定 ProFlares 的相關參數。
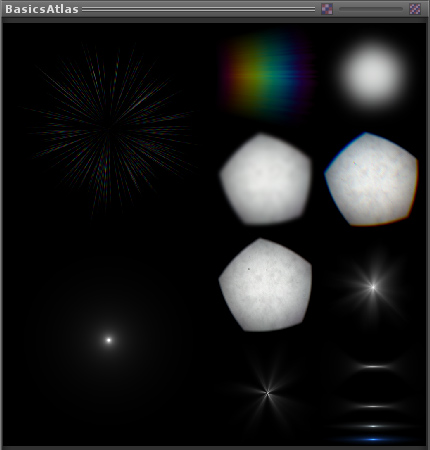
此時屬性編輯器會選取該物件的 ProFlareBatch 子物件,並出現「Assign a Flare Atlas.」的提示訊息,需要指定反光效果的圖片,只要將 [ ProFlares > Presets > Basic > BasicsAtlas ] 資料夾的 BasicsAtlas.prefab 預製物件拖曳到 Flare Atlas 欄位,提示訊息將會消失。
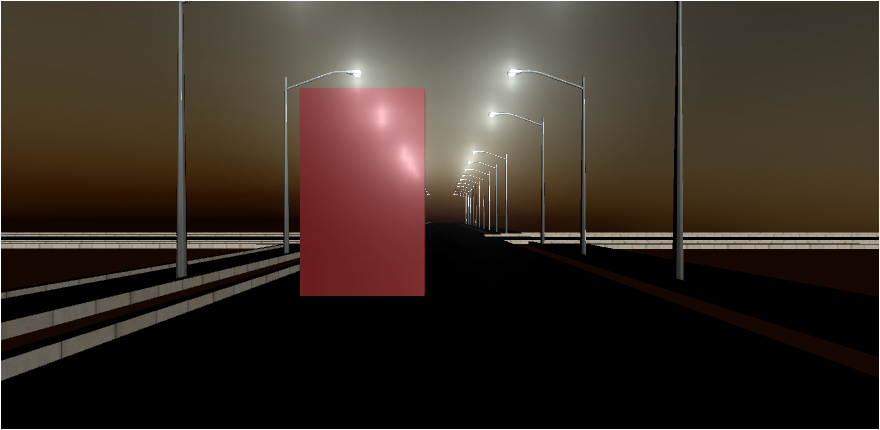
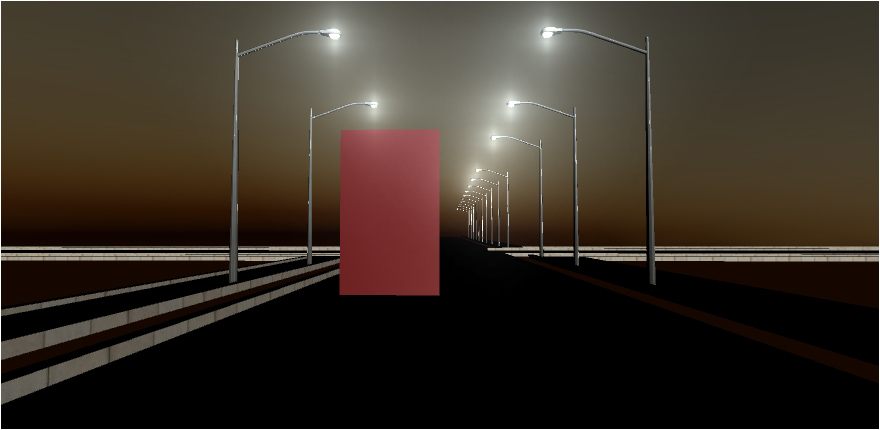
接著選取一個需要增加光暈效果的物件,此物件不需要 Light 燈光元件,注意 Scene 場景視窗不會顯示這些效果,必須在 Play 模式確認光暈與反光效果。
Glint_01
Glint_09
Glow_LargeFalloff
Iris_Pentagon
Iris_Pentagon_Chroma
Iris_Pentagon_Soft
Iris_Pentagon_SuperSoft
Shmmer_Long_Chroma_02
Spectrum_Point_01
Steak_SoftEnds
Steak_SuperSoftEnds
Streak_LongBlue
Streak_LongWhite
All flares in this scene use the IslandDemoAtlas.
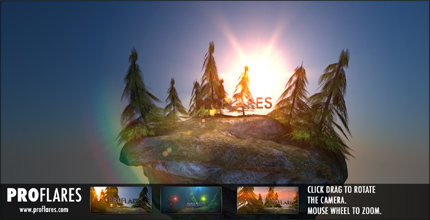
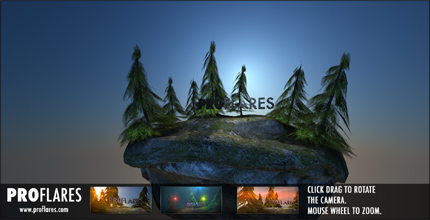

Preset Preview -
This scene is a great way to preview the example flares that ship with ProFlares, use the arrow keys to cycle through the flares and click drag anywhere on screen to move the flare. Try positioning the flare just of screen to see how the dynamic triggering feature causes flares to get brighter just as they leave the screen.
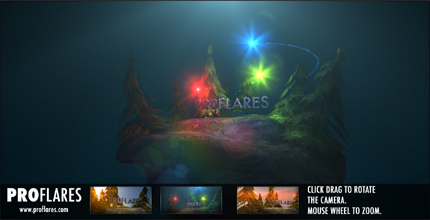
All flares in this scene use the MegaAtlas.
Multiple Camera Demo
此場景展示如何設定 ProFlares 以運作於多台攝影機的場合,The switching of cameras is handled by MultiCameraDemo.cs script.
Split Screen Demo
This demo shows how to use pro flares in a split screen environment. Each flare is rendered by two ProFlareBatch setups, one for each camera perspective.
認識 ProFlare atlases 圖集
ProFlares is very efficient at rendering flares, one of the reasons for this as it utilises ‘Texture Atlases’.
A texture atlas is a texture that contains multiple images of individual elements.
ProFlares 隨付 3 個 atlases, BasicAtlas, MegaAtlas and an additional Atlas for the IslandDemo Scene.
The basic atlas contains the essential building blocks of many types of lens flares, but only contains a small number of elements from the library. For more advanced flares consider working with the mega atlas.
儘量多嘗試並瞭解 ProFlare 的設定選項,才能在最短的時間創造出驚人的效果。
If your in sure how to create the initial setup required to add a flare to a scene please read the ‘Create A ProFlares Atlas’ tutorial.
光暈設定
To change the atlas first click the edit button. This will allow you to assign a new atlas by dragging the prefab on to the slot. Please note, If the new atlas doesn’t contain elements with the same name as the ones used in the flare, these elements will have to be reassigned.
You can also see each FlareBatch that is rendering this flare.
一般設定
These settings are inherited by all of a flares elements and can be used to control the overall look and behaviour of a flare. Scale – Affects the overall scale of the flare.
Tint – 設定光暈的整體色調。
Brightness - Controls the overall brightness of the flare.
Angle falloff - When angle fall off is disabled, a flares source acts like a point light and is evenly bright in all directions. When enabled it acts more like a spot light where the light is occluded when viewed from an angle.
Max angle – Defines the maximum angle between the flares forward direction and the main camera forward direction.
Affect scale – When enabled the flare will scale down to zero at the point that the angle between the camera and the flare equals the max angle.
Affect brightness – When enabled the flares brightness will reduce to zero at the point that the able between the camera and the flare equals the max angle.
Use Curve – When disabled both the scale and brightness reduction is calculated linearly. When enabled you can use the animation curve to adjust the interpolation of the flares scale or brightness. Using a steep curve can allow you to have the falloff only effect the flare when the angle is much closer to the maximum. Use the reset button to restore curves default.
Use Distance Falloff – When enabled the flare’s Scale and/or brightness can fall off based on its distance to the Main Camera.
Max Distance – This defines the distance that the flare will be completely invisible by.
將 提供的 BasicsAtlas 基本圖集拖曳到 Pro Flare 腳本元件下方的 Flare Atlas 欄位。
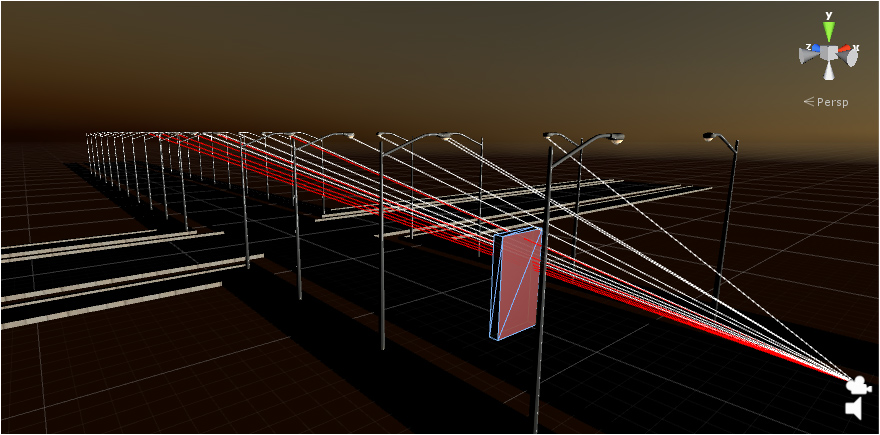
解決光暈數量倍增的問題?選取攝影機,在 Culling Mask 取消 Everything 然後再逐一加入下面的項目。
建議將街燈轉成預製物件,稍後只需修改 Prefabs 資料夾的預製物件,場景上所有的街燈將會同步修改。
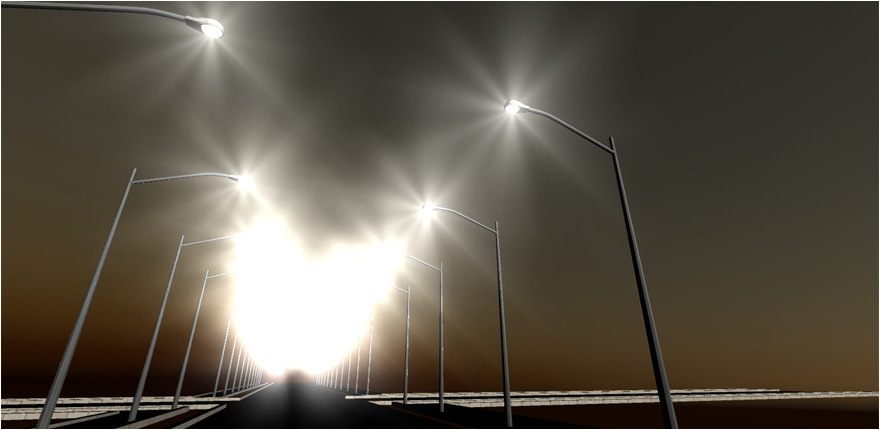
修正後的結果。
Affect Scale – When enabled the flare will scale down to zero at the point that the distance between the camera and the flare equals the max Distance.
Affect Brightness – When enabled the flares brightness will reduce to zero at the point that the distance between the camera and the flare equals the max Distance.
Off Screen Fade Distance – As the flare’s source point moves off screen the brightness will begin to fade, this value defines the distance needed for the flare to be now longer visible.
動態觸發
現實世界的鏡頭光暈會呈現不同的大小與亮度,主要是取決於它們的位置。動態觸發 ( Dynamic triggering ) 可以重建這些效果,當光暈在畫面的中央或邊緣位置時,您可以控制光暈的大小與亮度。
Use Dynamic Edge Boost – When enabled the flare’s appearance will be affected when the source is in the edge region of the screen.
Dynamic Edge Scale – This value is added to the flares global scale value. Use negative numbers to scale the flare down. Note this will still affect the flare even if its scale is set to zero.
Dynamic Edge Brightness – This value is added to the flares global brightness value. Use negative numbers to dim the flare. Note this will still affect the flare even if its brightness is set to zero.
Dynamic Edge Range – This is the width of the region around the edge of the screen. Note that the region expands in and outside of frame.
Dynamic Edge Bias – This value biases the edge range, to more inside our more out side the frame. Negative numbers bias to the outside.
Use Dynamic Centre Boost – When enabled the flare’s appearance will be affected, when the source is in the centre of the screen.
Dynamic Centre Range – This defines the radius of the area that will effect the flare.
Dynamic Centre Boost – This value is added to the flares global scale, when in the centre region of the screen.
Dynamic Centre Brightness – This value is added to the flares global brightness, when in the centre region of the screen.
Global settings : Occlusion 整體設定之遮擋效果
遊戲的過程中光源可能被其他物件遮擋, 然而在預設的情況下,光暈即使被物件遮擋也會出現在遊戲畫面上,啟用 Raycast Against Physics 選項即可解決問題,任何有碰撞器的物件都將會遮蔽光暈效果。
Raycast Against Physics – When enabled the flare will fire a ray from the source to the game camera. If it hits something the flare will be occluded. Occlusion happens over time so won’t cause the flare to instantly vanish.
Layer Mask 圖層遮罩 – This allows you to control which layers will occlude the flare.
Debug Info 除錯資訊 – 如果光暈被其他物件遮蔽的時候在此顯示,僅在 PLAY 模式才會啟用。
控制哪些圖層會遮擋光暈(請設定 Layer Mask = Default )
注意!光暈的遮擋效果在編輯模式將不會顯示,只有在進入 PLAY 模式時才會計算。
Element settings 光暈的元素設定
Flares are made up of flare elements. Each Flare element has many different options. Also there are two different types of element, ‘Single’ and ‘Multi’.
Single 是最基本的選項,只由單一元素組成。
Multi element consists of a number of subelements, and was added to avoid the requirement of adding lots of single elements that only have very subtle changes to their settings
按下 ‘Add New’ 按鈕加入新的光暈, Each Element is displayed with its own entry.
從左到右 Elements Color preview 元素顏色預覽、thumbnail preview 縮圖預覽、 a toggle visibility, select ‘Element Drop Down’, Element type, toggle edit element, clone element button and a remove element button.
To change the element’s texture to one from the assigned ProFlareAtlas, use the ‘Element Drop Down’
要改變元素的形態,使用 type 下拉式選單。
You can clone an element, by hitting the clone button this will make a exact clone of the element.
Quick Edit Bar 快速編輯列
When you hit Edit it exposes all the settings for an element. Right at the top is a quick edit bar this exposes some commonly accessed properties such as scale and colour.
Multi Element Options 多重元素選項
The multi element type has an extra section. This is used for controlling the number of sub elements. Use the controls to simply add more or remove elements. Update Random seed, will modify all of the multi elements random seeds. Which are used by Random Scale, Random Color, Random Rotation and the offset range.
Offset Options – Single
Offset – The offset amount defines how much a flare element will positioned away from the flares source. Some values that are worth noting, Negative one positions the element directly on the source of the flare. Zero positions the element directly in the centre of the screen this will look odd as the element won’t move, try either side of zero.
Offset Options – Multi
Use Offset Range – When disabled all flare element are positioned at a single offset position. When enabled each flare element is randomly position between two flare offset values.
Offset Options – Common
Anamorphic – Use the anamorphic sliders to adjust the elements position. Avoid putting both values to full as this will crush all the elements back to the flare’s source.
Position Offset – This adds a screen space offset to a flare element position.
Color Options – Single
Tint – Tints the element’s colour.
Color Options – Multi
Use Color Tint Range – When enabled its possible to select to colors for the flare elements, this is then interpolated from the element closest to the flares source to the one furthest away.
Random Color - Use the random colour sliders to add a variation to each elements individual colour tint.
Scale Options – Common
Scale – Sets the scale of the element.
Aspect – Allows you to scale a flare on either X or Y.
Scale Options – Multi
Random Scale – Add a random scale to each sub element.
Use Scale Curve – When enabled each flare element will be scaled based on its offset and the the height of curve. Use the reset button to restore defaults.
Rotation Options – Common
Angle – Offsets a elements rotation.
Rotate to Flare – This rotates a flare element to the flare source. Adjust the angle to get the required alignment.
Movement Based Rotation – When the flare moves on screen this value will rotate the element.
Rotation Overtime Speed – This rotates the element over time.
Rotation Options – Multi
Use Star Rotation – When enabled a each sub element will be rotated based on the number of sub elements.
Use Random Rotation – Use to add some variation in each sub elements rotation.
Override Options – This section is used to override the behaviour of a flares dynamic triggering. Allowing an element to ignore the global value.