JU TPS 3 教學(製作 TPS 遊戲)
JU TPS Documentation (gitbook.io)
快速連結 [玩家角色] [新增武器] [背包系統] [敵人角色]
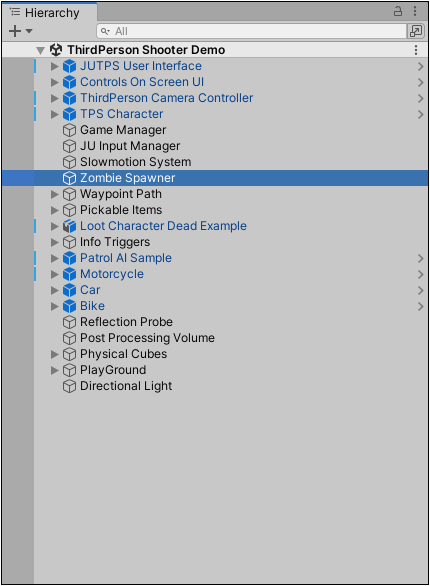
先看 ThirdPerson Shooter Demo 範例場景 TPS Character 約有 15 個不同功能的元件,可依遊戲需求進行調整。


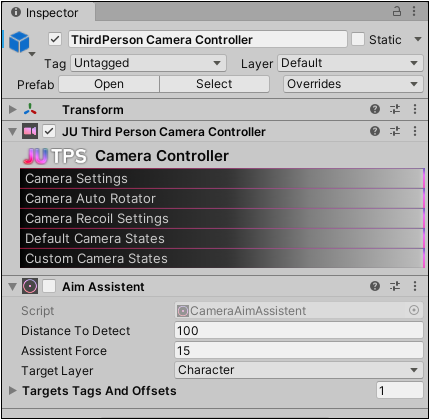
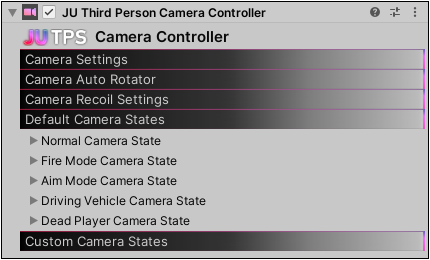
ThirdPerson Camera Controller 適用於第三人稱射擊遊戲的攝影機,提供瞄準輔助的功能。

JUTPS User Interface 用於顯示遊戲界面


敵人生成區 Zombie Spawner

從新的場景開始
建立一個新場景,滑鼠移至 Hierarchy 視窗空白處按滑鼠右鍵 [ JUTPS Create > Quick Scene Setup ] 。
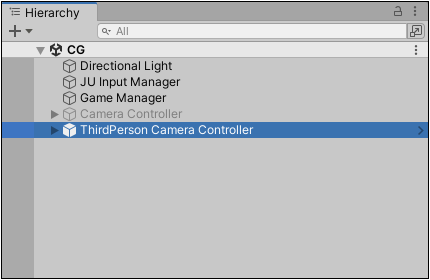
將會新增 JU Input Manager、Game Manager、Camera Controller 物件,並刪除預設的 Main Camera 攝影機。

拖曳 ThirdPerson Camera Controller 到場景,這是第三人稱射擊遊戲的攝影機預製物件,將會自動跟隨玩家。
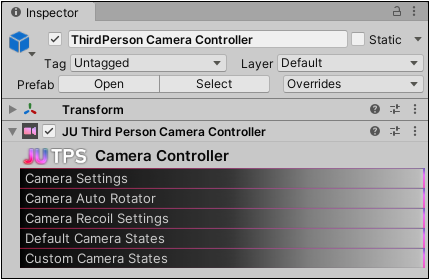

攝影機參數設定


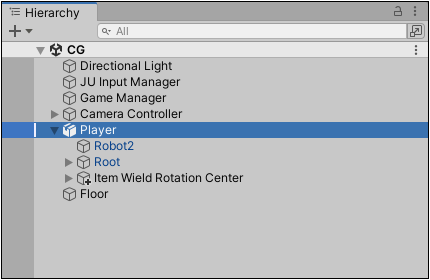
拖曳遊戲角色的預製物件 TPS Character 到場景。


隱藏 GIZMO 後可檢視 TPS 遊戲角色。

此時按 Play 測試遊戲可正常執行,來看看 TPS Character 預製物件的元件:
Inventory
Item Switch Manager
Driver Procedural Animation

Drive Vehicles System

Body Lean
Footstep
JU Foot Placement
JU Character Controller
JU Character Controller
JU Health
JU Character Settings Drawer
Advanced Ragdoll Controller

Damageable Body

Fall Damage
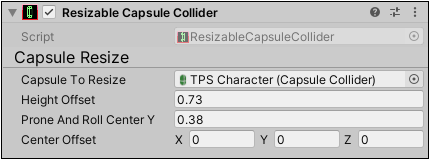
Resizable Capsule Controller
加入UI使用者介面
為了顯示血條、背包系統、武器的準星,開啟 [ Julhiecio TPS Controller > Prefabs > Game > UI Interfaces ] 資料夾,將 JUTPS Default User Interface 拖曳到場景,這是 UI 的預製物件。
★
自行製作遊戲角色
[官網教學]
首先在匯入角色模型,設定 Animation Type = Humanoid 並拖曳到遊戲場景。
![]()
![]()
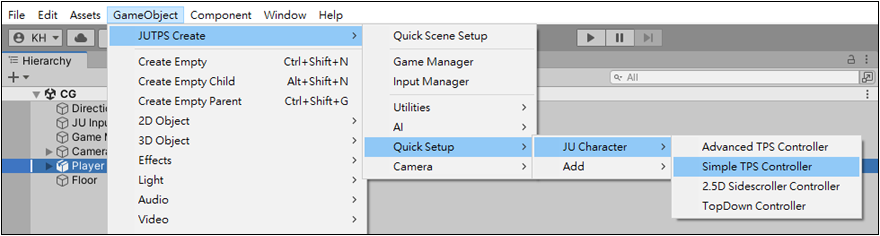
選取遊戲角色後,執行 [ GameObject > JUTPS Create > Quick Setup > JU Character > Simple TPS Controller ] 。
先說明 Simple TPS Controller 角色控制器,提供簡單的設定,僅有 JU Controller 與 Footstep 元件。
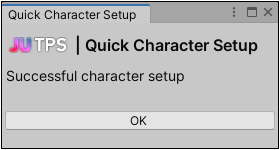
設定成功時將會顯示 Successful character setup 訊息,若未選取角色則會顯示 No Selection 錯誤。


按下 Play 測試遊戲,使用鍵盤即可控制 Robot Kyle 移動,設定步驟很簡單!

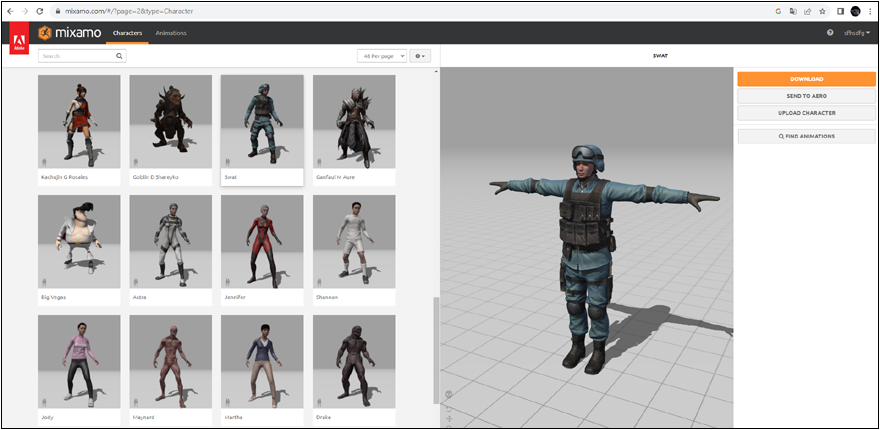
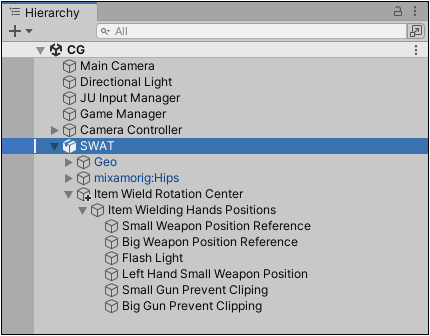
接著換成使用 mixamo 網站的 SWAT 角色,這將會更接近 TPS 射擊遊戲的感覺!
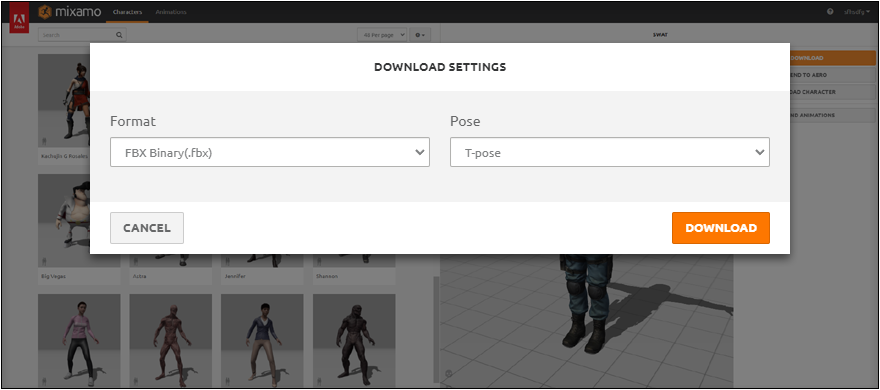
設定 Animation Type = Humanoid


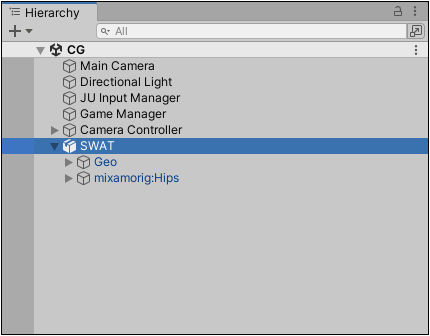
選取 SWAT 遊戲角色並執行 [ GameObject > JUTPS Create > Quick Setup > JU Character > Simple TPS Controller ] 。

目前的玩家角色無法對敵人造成傷害
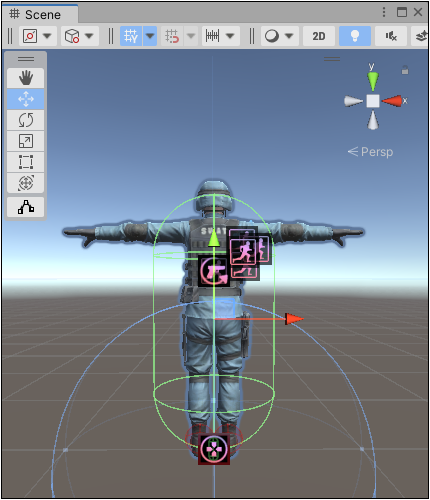
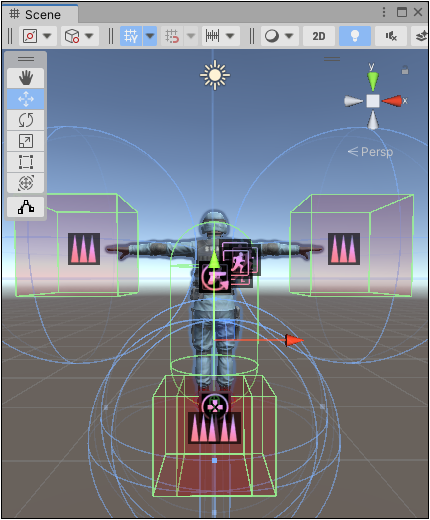
執行 [ GameObject > JUTPS Create > Quick Setup > Add > Setup Character Hit Boxes ] 增加碰撞方塊。

加入武器
開啟 [ ... > Prefabs > Items > Weapons > Guns ] 資料夾,選取 P226 手槍預製物件。

拖曳到 mixamorig:RightHand 骨架的下方,成為該骨架的子物件。


按 Setup Items 按鈕,剛加入的 P226 將被放入 Holdable Items Right Hand 陣列。


按下 Play 測試,確認武器是否可以使用。
設定武器解鎖狀態

調整武器的抓握姿勢。
使用快速設定的 Advanced TPS Controller 選項。

Advanced TPS: 角色控制器將加入以下元件:Foot Placement, Footstep, Body Lean, Drive Vehicles, Procedural Driving Animation, Ragdoll Controller
Configuring the JU Character Controller
Locomotion Settings
Auto Step Up
Auto Step Up is a system that makes the JU Character Controller go up stairs, similar to the "Step Offset" of the default Character Controller, but with more options.
| Step Correction | Enable Step Up System |
| Up Step Speed | Movement speed |
| Step Correction Layer | Allowed layers to do step up move |
| Step Raycast Distance | Length of sensor ray from ground |
| Forward Offset | Forward sensor ray position adjustment |
| Step Height | Minimum step height to step up |
Fire Mode
Fire Mode is the way the character is prepared to attack, the camera is closer, the character looks forward and wields an item.
| 射擊模式選項 | 說明 |
| Item Aim Rotation Center | It is Fire Mode's item rotation pivot and also handles wielding positions. |
| Upper Chest Bone | Upper Chest Bone |
| Aim Mode | This variable will define if you will have to hold the aim button or just press it once to aim |
| FireMode Max Time | The time it will stay in Fire Mode without interacting, but this option is only useful in Free Locomotion mode |
Animator
If you want to create a custom animator or just edit the names of the Animator Controller parameters, this is where you'll edit.
Death Events
Controller Options
These options are very important to define the JU Character
| 選項 | 說明 |
| Block Vertical Input | Block Vertical Input from locomotion, useful for sidescroller game type |
| Block Horizontal Input | Block Horizontal Input from locomotion |
| Block FireMode On Cursor Visible | Block FireMode when mouse cursor is visible, useful to access menu/inventory and not shoot accidentally, on mobile it makes no difference. |
| Block FireMode On Punching | |
| Enable Punch Attacks | Enable punch attacks |
| Enable Roll | |
| Is AI | If it's on, the default Inputs won't be used, so you can program an AI/NPC the way you want, or just use the built-in AIs |
布偶
https://www.youtube.com/watch?v=S4A8zrW8_CE
Damageable Body
In order for your JU Character to receive damage in the bone colliders(and not in the sphere around it), it is interesting to use the Damageable Body script.
Damageable Body Script
This script automatically adds Damageable Body Parts to a JU Character's bone colliders, or changes the values of existing Damageable Body Parts.
Damageable Body Part
The name can be confusing, but they are different scripts, this script is in the bone collider of the JU Character that will receive the damage, it can increase or decrease the damage, great for a HeadShot. The value of this script is changed to the armor protection system.
Physical Damage 物理傷害?
In JU TPS 3 it is possible to make a character receive physical damage, like in real life, if something heavy hits you, it doesn't hurt you, if something heavy hits you at a certain speed you can have real damage.
將 BaseballBat、Katana 、UMP 等預製物件拖曳到場景,玩家接近時按 F 可以取得物件,但要如何使用?
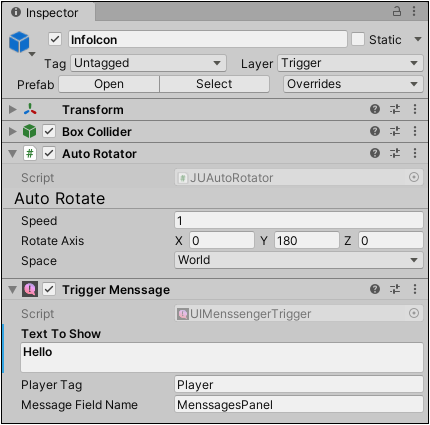
InfoIcon 資訊圖示(旋轉問號)
Pickable Items:
Helmet Armor 頭部護具
Chest Armor 身體護具
Katana 刀
Granade 手榴彈
Benelli M4(伯奈利 M4 半自動散彈槍)
SNIPER M82(巴雷特M82狙擊步槍)
P226(半自動手槍)
相關網頁
CG/Models