Unreal Character 角色設定教學
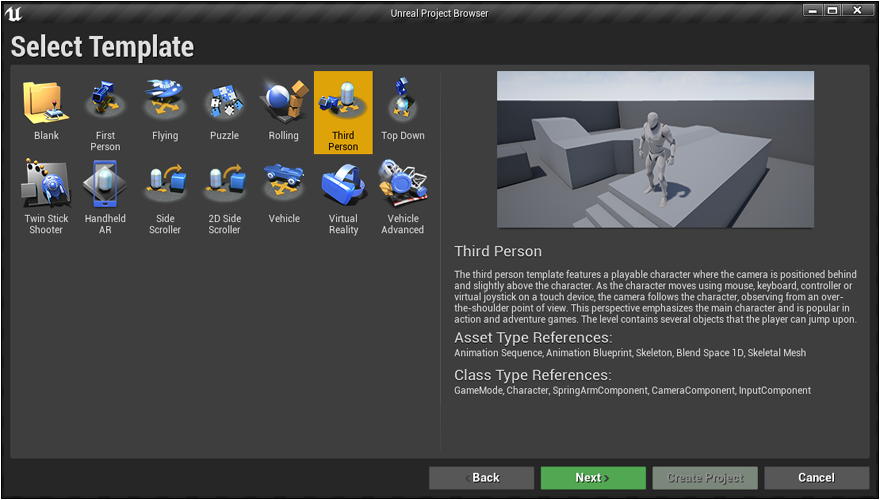
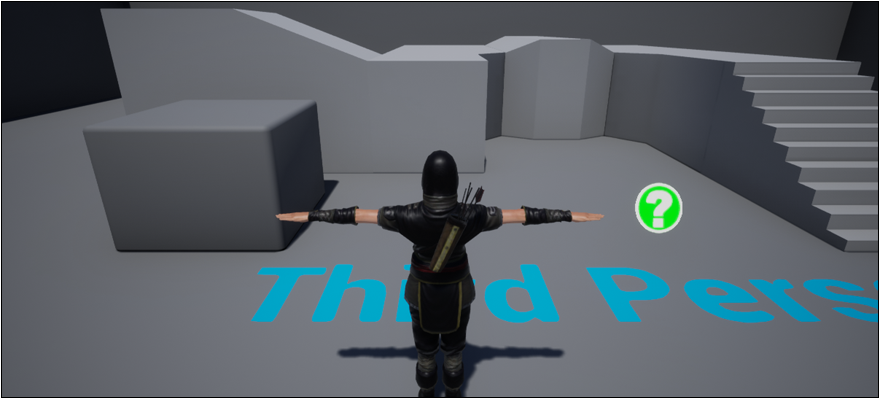
本教學示範 Unreal Engine 角色設定步驟,首先建立一個新遊戲專案,選擇 Third Person 第三人稱的遊戲樣版。
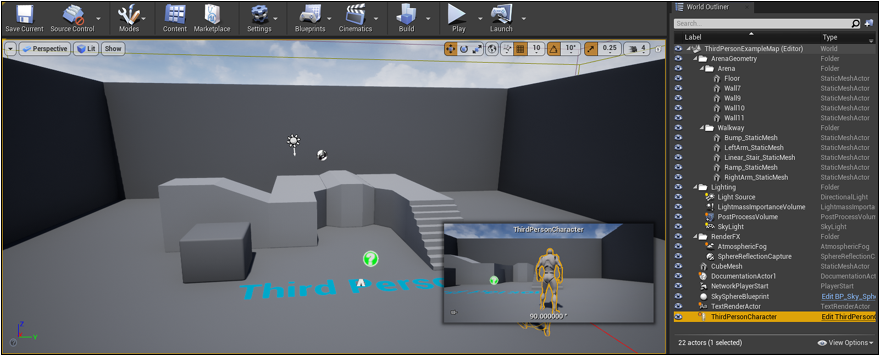
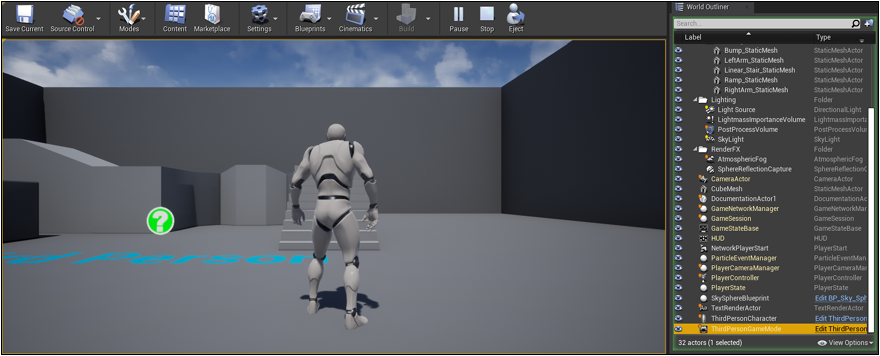
按下 Play 測試遊戲,目前僅有預設的待機、跑步等動作。稍後將替換為需要的遊戲角色與動作。
本教學使用 Mixamo 網站的角色,選擇 Akai E Espiritu 女弓箭手,可先下載不含動畫的角色模型 ( T-Pose FBX ) 。
套用 Idle 待機動作,可調整手的位置,下載時選擇 Skin = Without Skin 的 FBX 檔。
套用跑步動畫並勾選 In Place 原地動畫,下載時選擇 Skin = Without Skin 的 FBX 檔。
練習時可在此下載檔案 [ ErikaArcher.fbx | Idle.fbx | Running.fbx ]
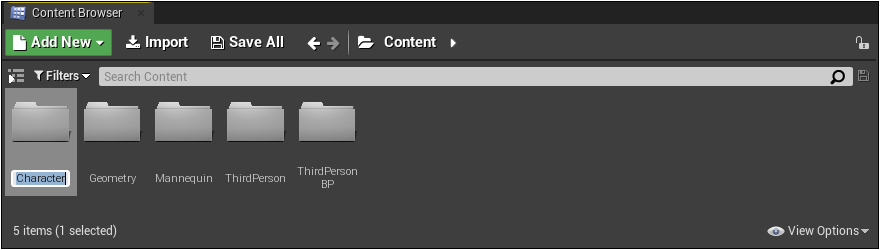
模型與動作準備完成,回到 Unreal 在 Content Browser 新增一個資料夾,然後將下載的角色 FBX 拖曳到此資料夾。
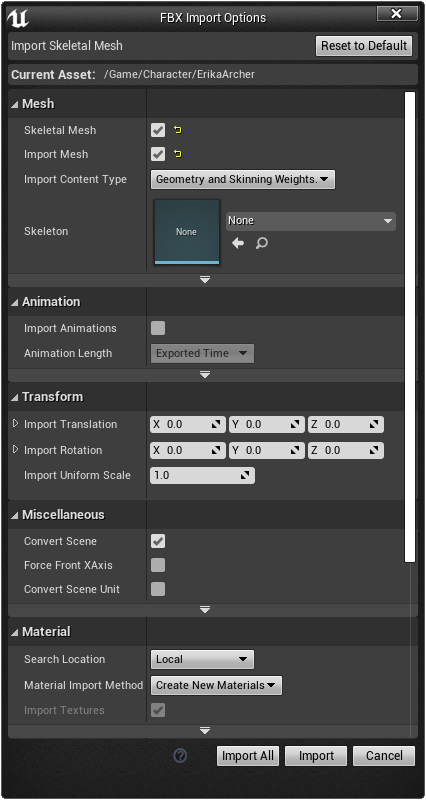
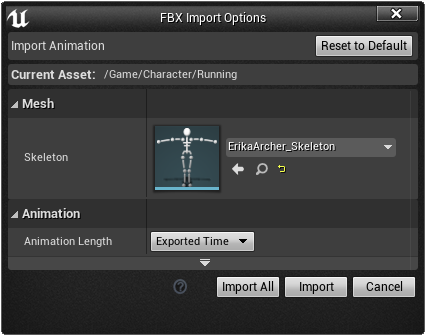
Skeleton 勿選,確認 Import Textures 打勾,匯入紋理貼圖。
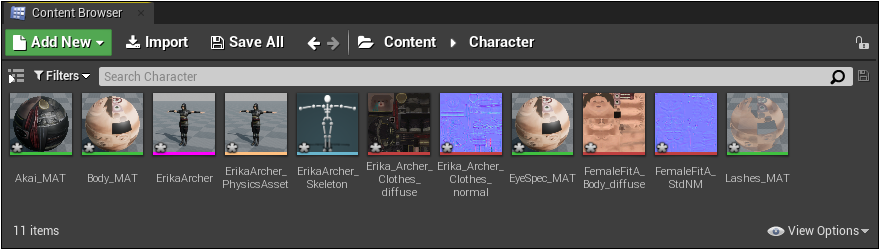
匯入後解開的檔案包括材質、網格、骨架、貼圖等。
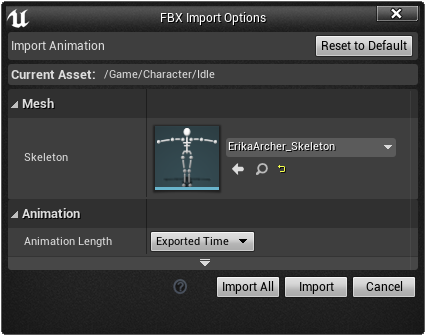
再匯入 Idle 待機與 Running 跑步動畫,此時 Skeleton 骨架將會自動對應剛才的角色。
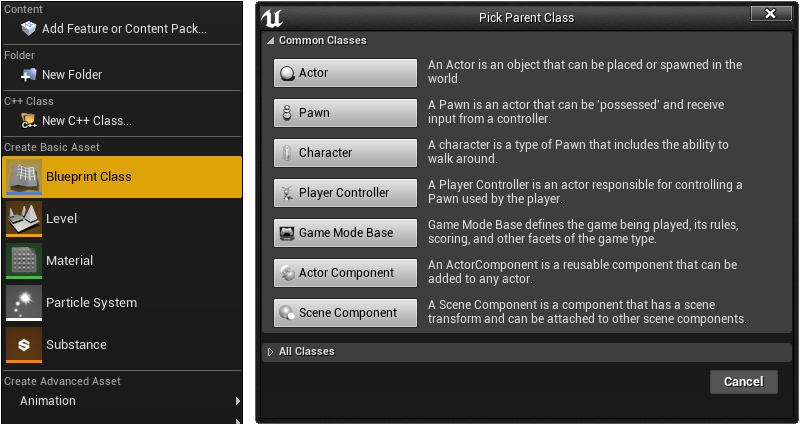
接著在 Content Browser 滑鼠右鍵新增 Blueprint Class 再選擇 Character 藍圖類別。
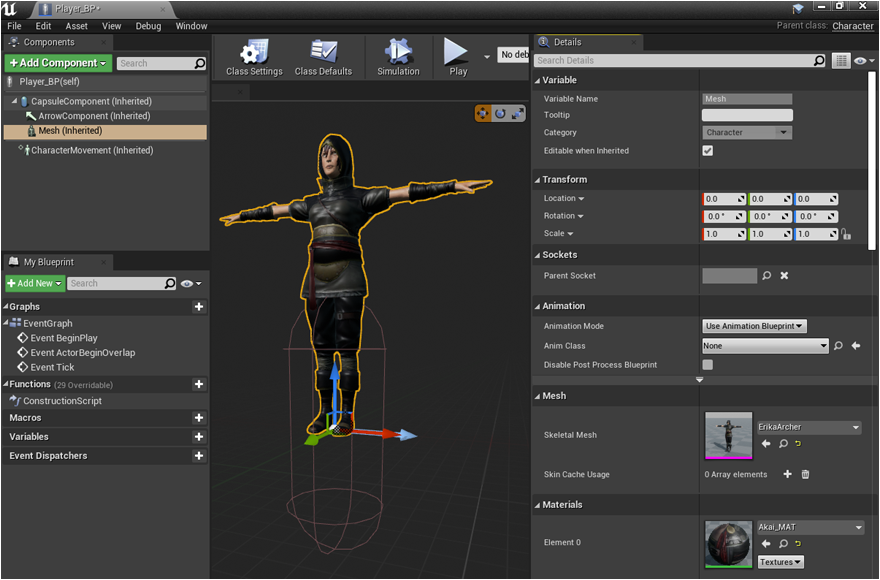
接著在 Content Browser 雙擊開啟藍圖進行編輯,目前藍圖中缺少角色的網格,選取 Mesh 網格元件。
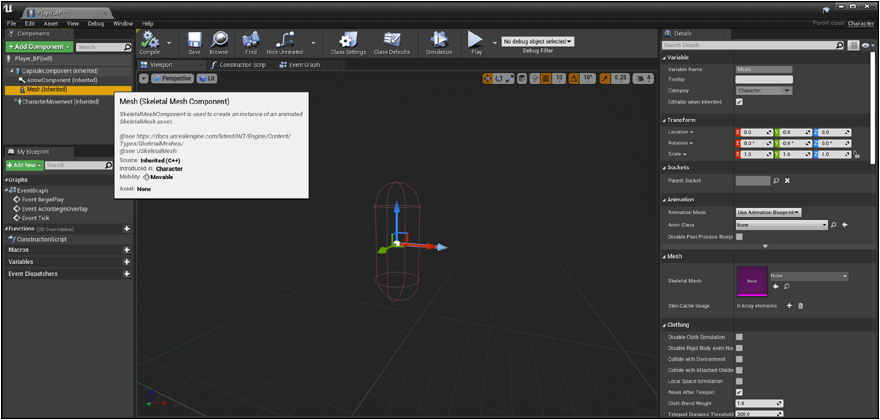
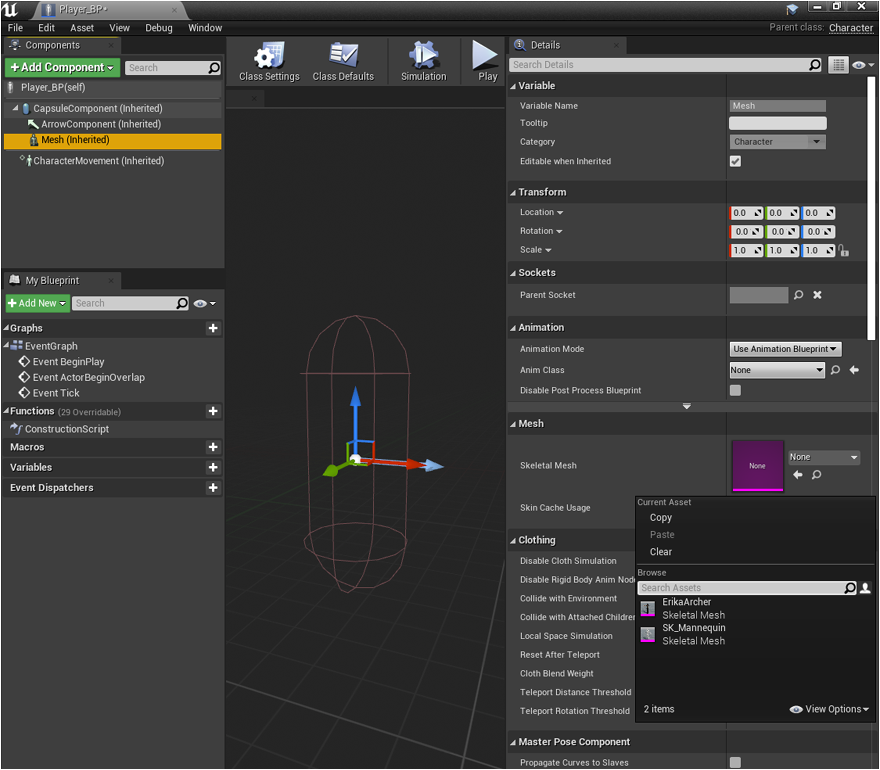
選取 Mesh 網格元件後,右側 Details 面板的 Mesh 網格設定 Skeletal Mesh = 匯入的遊戲角色骨架網格。
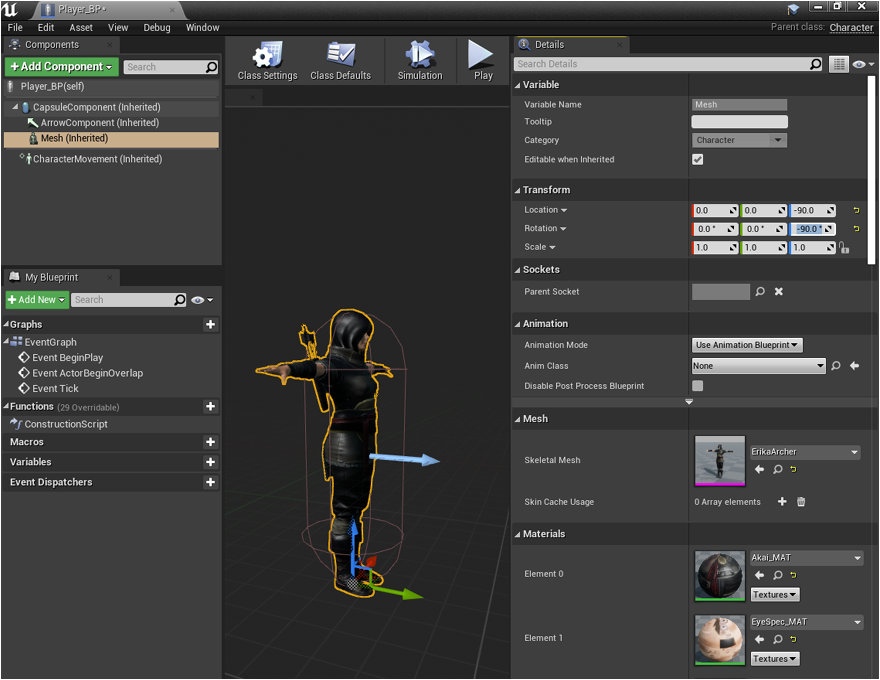
仍選取 Mesh 網格元件設定 Location Z = -90 符合膠囊元件的位置,設定 Rotate Z = - 90 轉到淺藍色箭頭方向。
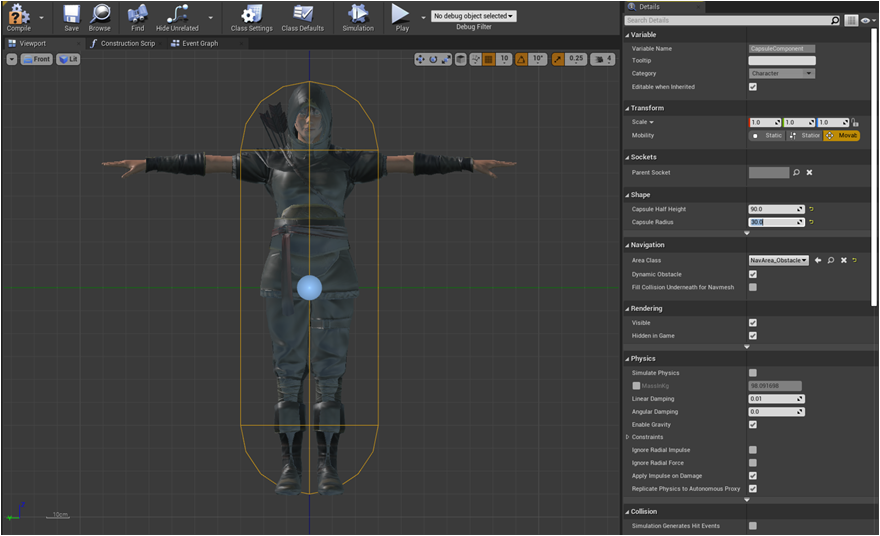
再選擇 CapsuleComponent 膠囊元件,設定 Shape 的 Capsule Half Height = 90 與 Capsule Radius = 30 用於碰撞偵測。
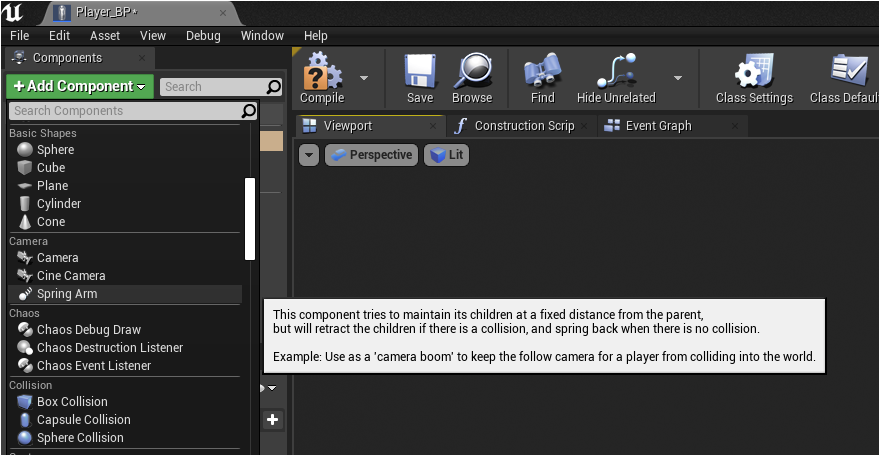
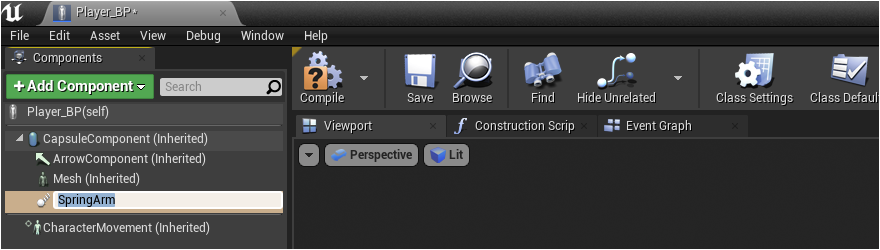
加入攝影機
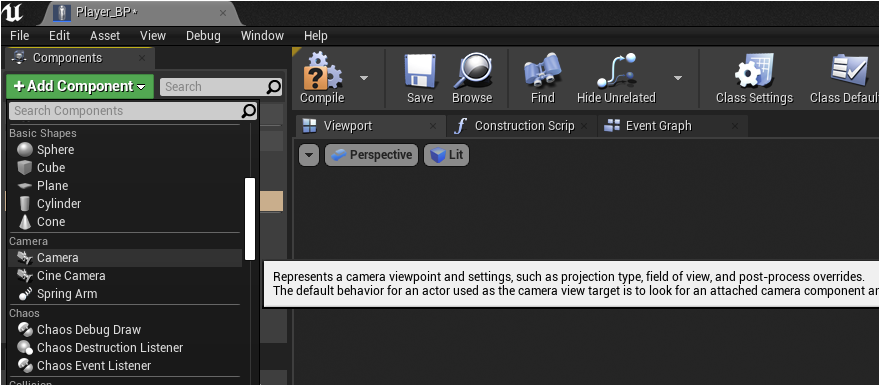
按下 Add Componennt 增加 SpringArm 元件,選取新增的 SpringArm 元件後,再次新增 Camera 攝影機元件。
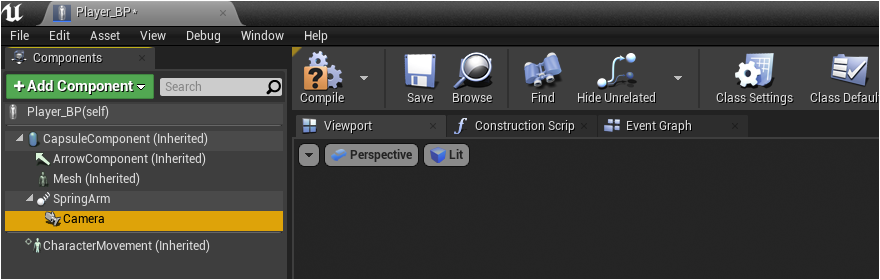
選取 SpringArm 元件,再加入攝影機。
設定到這個階段可先按 Save 儲存藍圖。
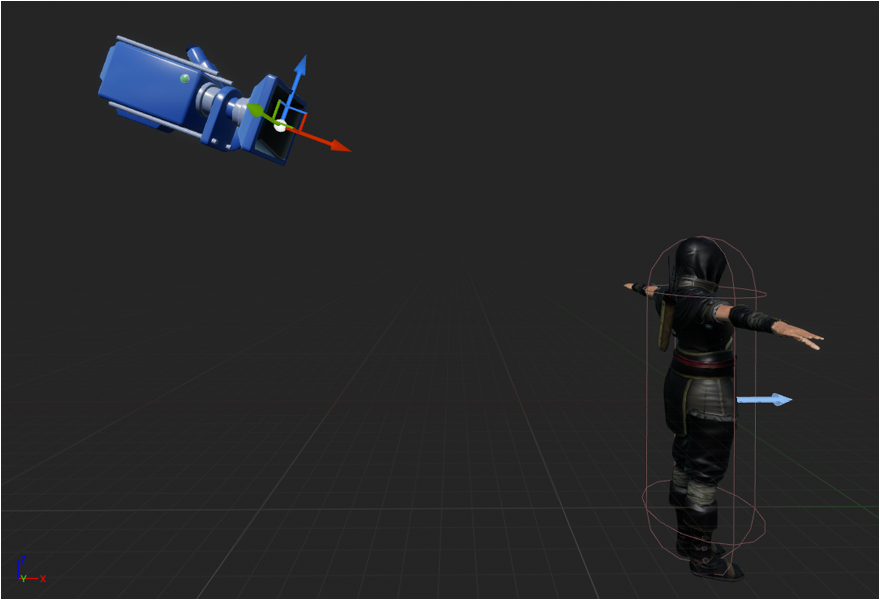
適當調整攝影機的位置與角色,讓攝影機跟隨玩家角色移動。
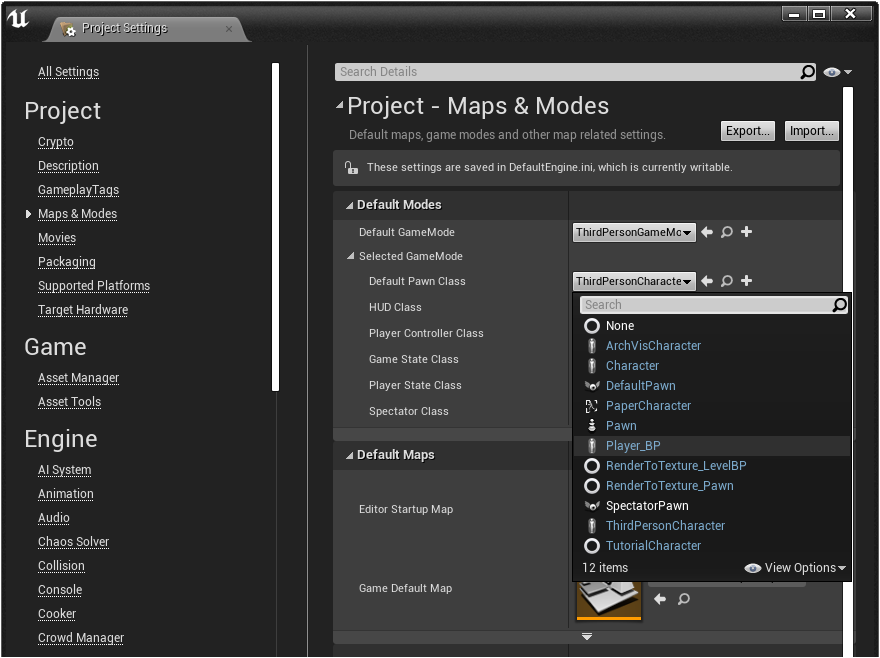
目前製作的遊戲角色,若希望進入遊戲時動態生成,可開啟 Project Settings 專案設定,選擇 Maps & Modes
展開 Selected GameMode 後將 Default Pawn Class 改為目前製作的 Player_BP 藍圖,回到遊戲場景按 Play 測試。
透過 Project Settings 專案設定的 Input 輸入設定可以看到預設綁定的動作對應,維持預設值不需要修改。
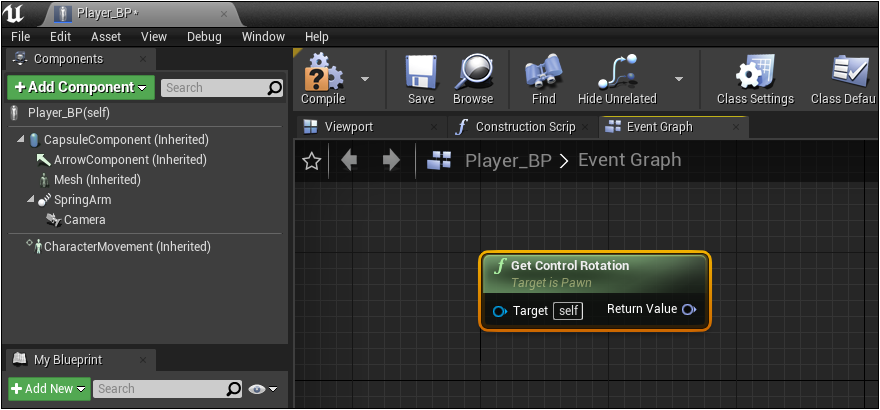
目前無法控制,開啟編輯器的 Event Graph 分頁,圈選預設的 3 個節點,按下鍵盤 Delete 刪除這些節點。

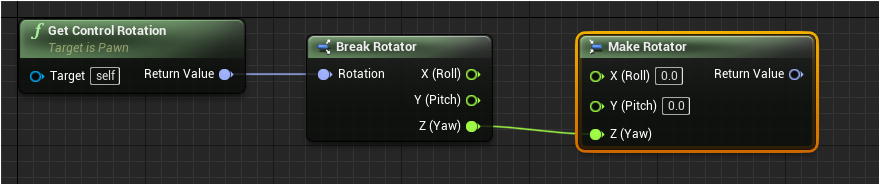
空白處按滑鼠右鍵,建立 Get Control Rotation 控制轉向節點。
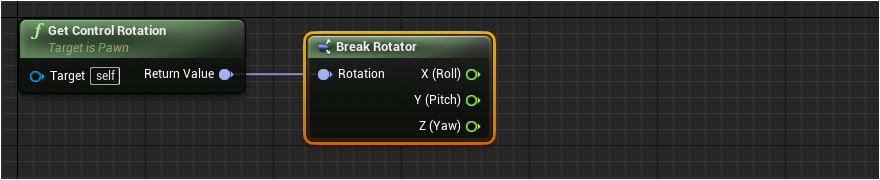
從 Get Control Rotation 節點的右側拖曳拉出連接線,新增 Break Rotator 節點。
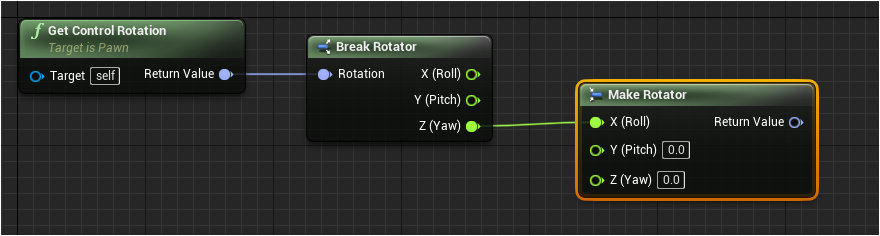
從 Break Rotator 節點的右側 Z ( Yaw )拖曳拉出連接線,新增 Make Rotator 節點,連線改為 Z (Yaw) 連接到 Z (Yaw) 偏航
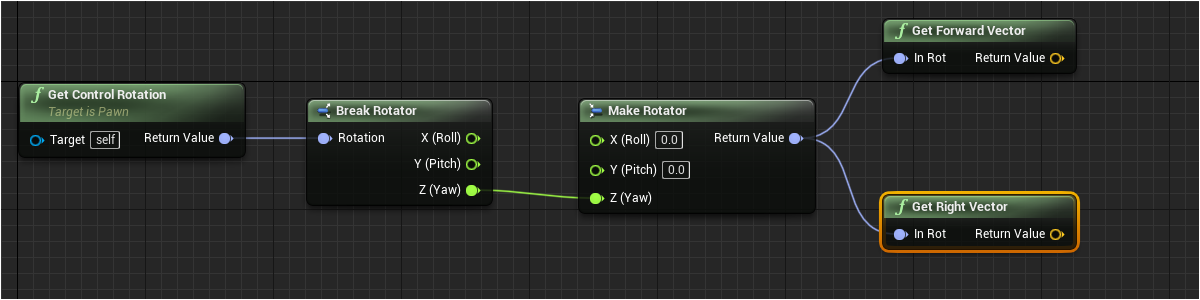
從 Make Rotator 節點右側的 Return Value 拖曳拉出連接線,新增 Get Forward Vector 節點,

從 Make Rotator 節點右側的 Return Value 再次拖曳拉出連接線,新增 Get RightVector 節點,
增加下圖的節點與建立連線。
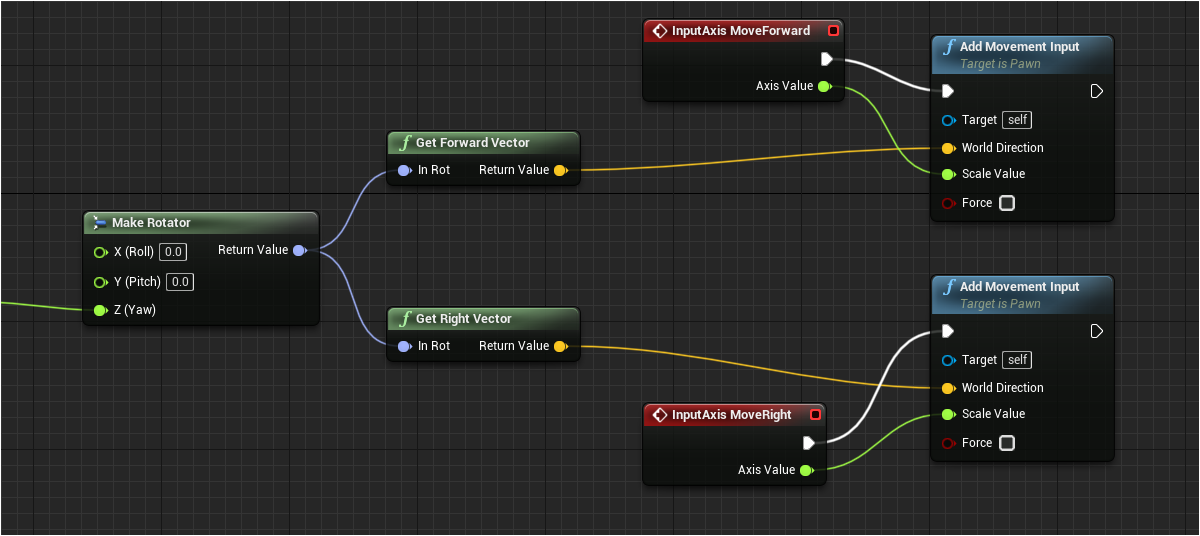
按下 Save 與 Compire 儲存藍圖,回到關卡按下 Play 測試,此時遊戲角色可以移動,但是無法轉向。
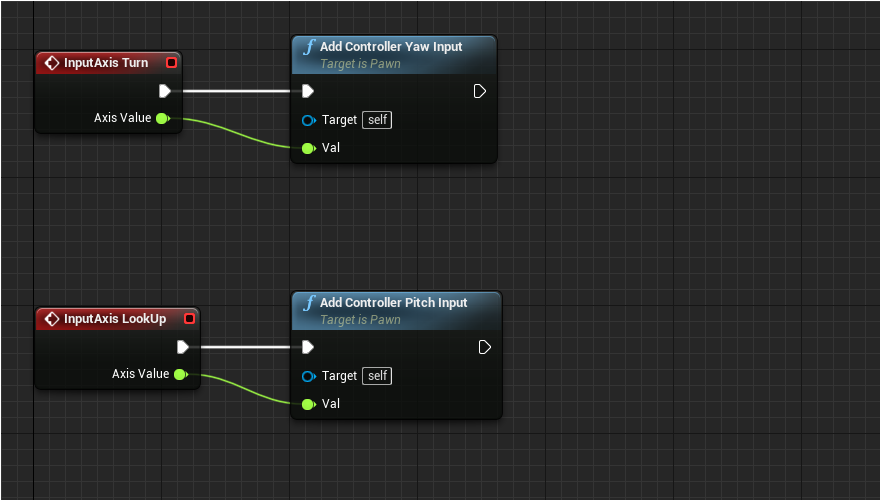
增加 Input Axis 與 Add Controller 節點。
按下 Save 與 Compire 儲存藍圖,回到關卡按下 Play 測試,遊戲角色可以移動轉向,但沒有動作。
讓攝影機跟著轉動的設定,選取 SpringArm 元件後,開啟 Use Pawn Control Rotation 選項。
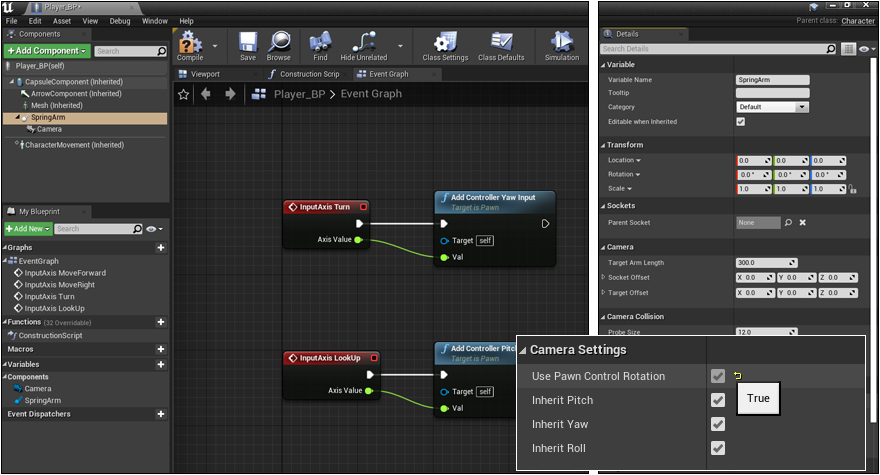
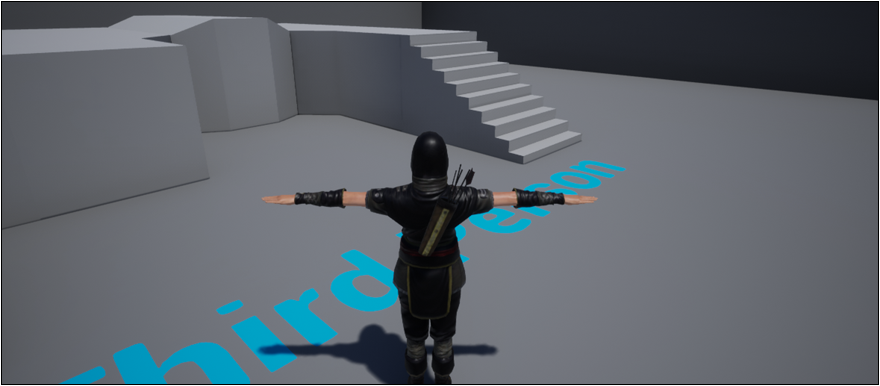
按下 Play 測試遊戲,確認攝影機跟隨轉動視角。
With the addition of a CharacterMovementComponent, a CapsuleComponent, and a SkeletalMeshComponent, the Pawn class is extended into the highly-featured Character class. A Character is designed for a vertically-oriented player representation that can walk, run, jump, fly, and swim through the world. This class also contains implementations of basic networking and input models.
SkeletalMeshComponent
Unlike Pawns, Characters come with a SkeletalMeshComponent to enable advanced animations that use a skeleton. It is possible for other Skeletal Meshes to be added to Character-derived classes, but this is the main Skeletal Mesh associated with the Character.
以下來自 https://docs.unrealengine.com/4.27/en-US/Basics/Actors/SkeletalMeshActors/
認識 Skeletal Mesh Actor
使用 Unreal Engine 製作的遊戲,玩家在畫面上控制的角色通常是一種稱為 Skeletal Mesh Actor 的特殊網格組成,可用於顯示在 3D 軟體製作的遊戲角色與匯入 Unreal Engine 的複雜動畫資料。
Skeletal Mesh Actor 與 Static Mesh Actor 是不同的,因為 Skeletal Mesh Actor 內部有一個複雜的骨架,用於移動骨架網格以製作動畫。由於 Skeletal Mesh Actor 可以使用複雜的骨架,通常用於角色、生物、複雜機械,或者任何需要變形或顯示複雜運動的物件。
放置 Skeletal Mesh Actor 到關卡
Skeletal Mesh Actors are placed in maps using standard Actor placement methods; either through the Right-click context menu of the viewports or by dragging and dropping from the Content Browser.
從 Content Browser 選取需要的 Skeletal Mesh Actor 拖放到關卡,稍後可以調整到適當的位置。
播放 Skeletal Mesh Actor 的動畫
Getting a Skeletal Mesh Actor so that it will animate while the game is running can be done two different ways inside of UE4. You can use an Animation Blueprint, which will allow you to play and blend multiple animations together. Or you can use and Animation Asset to play a single Animation Sequence. In this tutorial, we will be focusing on using an Animation Sequence to play our animation while the game is running.
Skeletal Mesh Actor Setup 設定
The setup for getting a Skeletal Mesh Actor ready to play an animation is actually quite simple and can be done in the following steps.
First find the Skeletal Mesh you want in the Content Browser
Once you have found the Skeletal Mesh you wish to use, add it to the level either via dragging and dropping or via the Context Menus.
When completed, you should have something that looks like this.
Skeletal Mesh Animation Setup 動畫設定
將 Skeletal Mesh Actor 放在遊戲場景後,可透過以下步驟增加角色的動畫。
1. 首先需要準備一個播放的 Animation Sequence 動畫序列,以下教學將使用Trooper_Main動畫序列。
2. 找到需要使用動畫,設定讓 Skeletal Mesh Actor 可以使用此動畫,需要將動畫模式從使用 Animation Blueprint 動畫藍圖設置為使用 Animation Asset 動畫資源。
3. Once the Animation Mode is set correctly, it is now time to choose the animation that we want to play. To do this, simply select the Animation Sequence that you want to play from the Content Browser and then assign it to the Anim to Play section by either dragging or dropping the Animation Sequence on to Anim to Play or by using the Arrow to the right of the Anim to Play input box.
3. 動畫模式設定正確後,選擇想要播放的動畫,只需從 Content Browser 選擇要播放的 Animation Sequence 動畫序列,通過將 Animation Sequence 拖曳到 Anim to Play 上或使用右側的箭頭將其分配到 Anim to Play 部分要播放的動畫輸入框 。
播放 Skeletal Mesh Animation 動畫
Now make sure that both Looping and Playing are checked (which they should be by default) and then press the Play Button to see your animation playing during game.
Collision
Normal collision creation and detection does not work with Skeletal Mesh Actors. In order for your Skeletal Meshes to collide with objects in the level, your Skeletal Mesh Actors need to have a Physics Asset that is specially created for your object.
Creating Collision for a Skeletal Mesh Actor
To create a Physics Asset for your mesh, all you have to do is simply Right-click on the mesh in the Content Browser and then choose Create -> Create Physics Asset. You can read more about how to create Physics Assets by checking out the Physics Asset Tool documentation.
Assigning a Physics Asset
Once your Physics Asset has been created, it is now time to assign it to your mesh. Physics Assets can be assigned to Skeletal Meshes by simply opening up the Skeletal Mesh and then assigning the Physics Asset to the Physics Asset slot that is under the Physics section.
You can also override Physics Assets in your level by simply selecting your Skeletal Mesh and then under the Physics section of the Details panel, you can supply a new Physics Asset in the Physics Asset Override section.
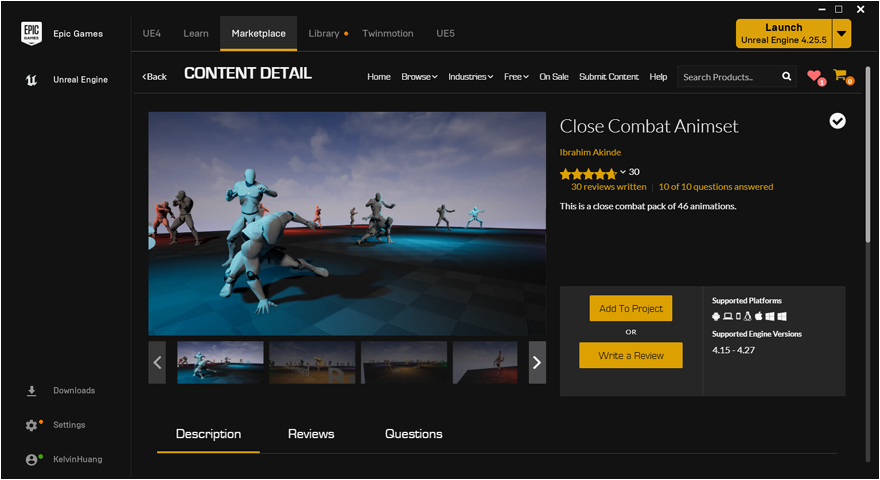
動畫部份使用 Close Combat Animset 講解,這是 UE Marketplace 虛幻商城 2021 年 9 月免費贈送的動作組。